- Your cart is empty
- Continue Shopping
How to make vinegar
- Health & Beauty, Vinegar
- Posted on
-
by Michael
- 0 comments
HOW TO MAKE HOMEMADE VINEGAR
How to make vinegar
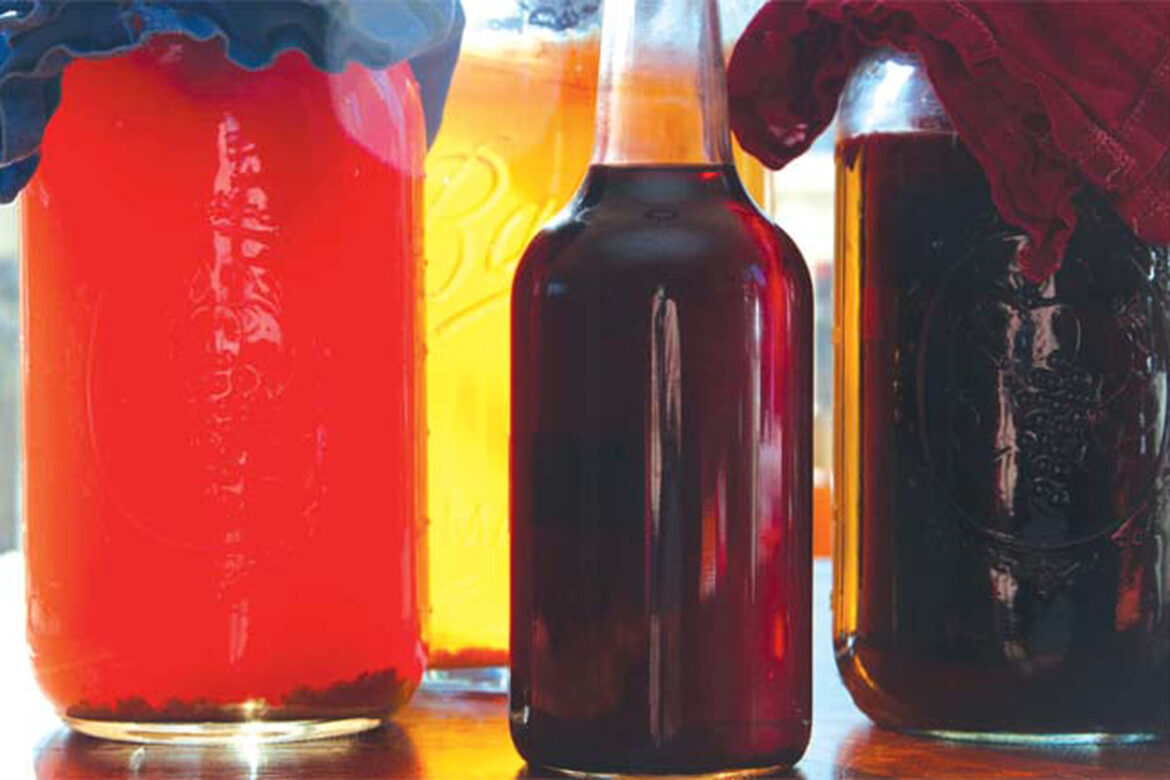
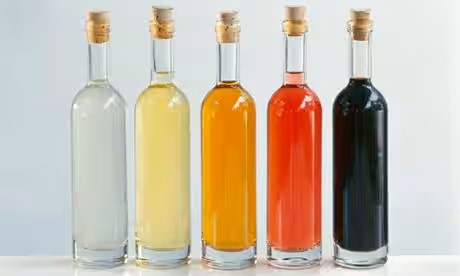
In our new series, Phil Daoust explains how you can make vinegar using almost any unfortified booze, from wine to cider. It’s quick and easy, and well worth the wait …
There’s a delightful unpredictability to homemade vinegar. You choose the main ingredient – pretty much any unfortified booze from Somerset scrumpy to French champagne – but after that nature takes over. All the hard work is done by microorganisms called acetic acid bacteria, which convert the ethanol in the drink to acetic acid, the substance that gives vinegar its kick.
The process takes months, and you can never be entirely sure what flavours will be introduced. It’s a lot like making sourdough bread, where you place your tastebuds at the mercy of natural yeasts. And it’s every bit as rewarding.
Most pantries are stocked with a variety of vinegar types but did you know you can make your own vinegar?
How to Make Vinegar at home is easy and more delicious than store-bought vinegar. This step-by-step guide covers how make apple cider vinegar, red wine vinegar, necessary supplies, potential issues and solutions.
Vinegar is easy to find at most stores and inexpensive to buy. So why make it yourself? Because the taste is recognizably better than purchased vinegar.
Plus, YOU made it. Isn’t that the best part? Some say it’s a great way to use up wine which does not get consumed (that seems an oxymoron to me; ‘wine’ ‘not consumed’).
Vinegar making can be done continuously so a fresh supply is always available.
VINEGAR MAKING SUPPLIES: EVERYTHING YOU’LL NEED TO MAKE YOUR OWN VINEGAR
- 1 gallon wide-mouth glass jar preferably with a metal spigot (can be larger than 1 gallon). NOTE: must be glass or ceramic crock; plastic will interact chemically with the vinegar.
- Cheesecloth and rubber bands
- A vinegar ‘mother’ (see Where To Buy below)
- The liquid to convert into vinegar (sulfite-free organic red wine if making red wine vinegar or hard cider if making apple cider vinegar; you can also make white wine vinegar through the same process)
HOW TO MAKE RED WINE VINEGAR
CAN ANY WINE BE USED?
Sulfite-free organic wine is required for making red wine vinegar. Sulfites can impede the conversion process so low or no sulfite wine should be used.
HOW TO MAKE APPLE CIDER VINEGAR
CAN IT BE MADE WITH REGULAR APPLE CIDER?
Hard apple cider is used to make apple cider vinegar. The alcohol content is needed for the vinegar conversion.
THE VINEGAR ‘MOTHER’
This name has always evoked memories of Sigourney Weaver in the movie Alien when she confronts ‘THE MOTHER’, the oozy, dripping, teeth-gnashing alien giant. A vinegar mother isn’t much prettier.
If the mother is left in the container for too long it can begin to rot and adversely affect the finished vinegar.
WHAT IS A ‘VINEGAR MOTHER’?
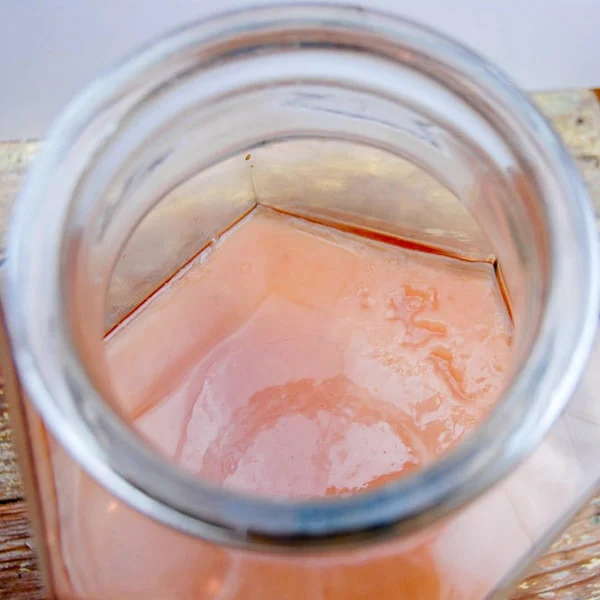
The vinegar mother is a mass of bacteria which serves to convert the liquid into vinegar. Also called a Scoby, which is an acronym for “Symbiotic Culture Of Bacteria and Yeast”.
When you begin to make vinegar, the vinegar mother is an innocuous mucoidal blob which you put in the jar with the liquid.
PRO TIP: You’ll need a vinegar type-specific mother; they are different depending on whether you are making apple cider vinegar, red wine vinegar or white wine vinegar.
Over time the mother grows to make an opaque thin layer on the top of the liquid. Each time you add more liquid (referred to as ‘feeding the mother’) it usually dislodges the vinegar mother and a new one will grow (see photo below).
When your vinegar batch is mature, you can even give part of your vinegar mother to a friend with some of the vinegar and they can start a batch of their own. I’ve heard tell of people (all of them in France) who have been working with the same vinegar mother for 20 years.
HOW TO MAKE VINEGAR AT HOME – STEP-BY-STEP
Making vinegar at home is basically the same whether you want to know how to make apple cider vinegar or how to make red wine vinegar. They share similar steps using different liquids.
STEP 1: PREPARATION BEFORE STARTING
- Decide where you’ll keep your vinegar. It should be a place where it can stay (the vinegar mother doesn’t respond well to being moved; it can become dislodged and discontinue making vinegar).
- It will need warmth (70-80 degrees is ideal), darkness and good air circulation.
A personal lesson about the container placement:
I started mine in December when it’s cold in Colorado. I put it up on the highest shelf in my laundry room which was good for warmth.
I wrapped a hand towel around the jar and fastened it with clips to keep it dark (a great TRICK when not having a dark area for the vinegar making).
It was too close to the ceiling however and was not getting enough air circulation.
It began to smell like acetone (which I’ve also read is part of the process but not having had that happen since I’d say it’s not good). I brought the jars down lower and they recovered fine. The cheesecloth, which you’ll put on the top of the jar opening, allows circulation and keeps things (fruit flies) out.
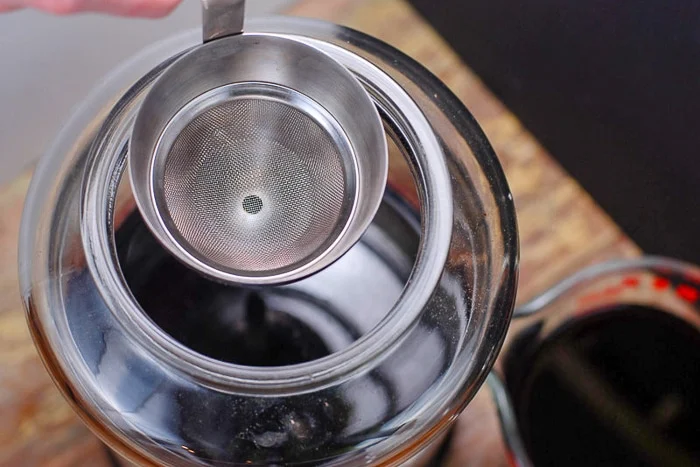
STEP 2: STERILIZE YOUR JAR WITH HOT WATER (NOT BOILING) AND DRAIN
Check that the spigot is functioning properly before beginning. Because the conversion process is ongoing, you’ll be ‘feeding the mother’ (adding additional liquid to convert to vinegar) regularly.
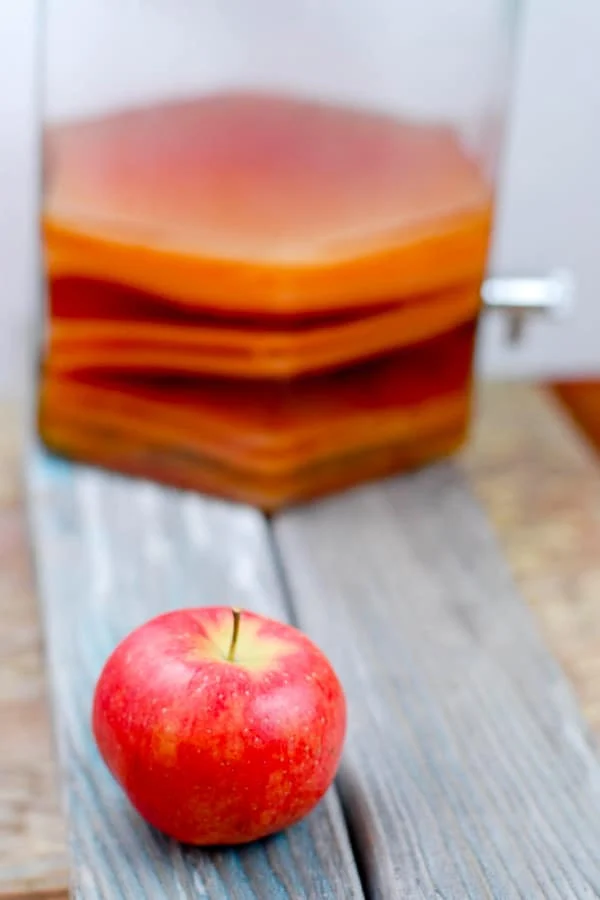
The converted vinegar will be at the bottom of the jar and the liquid in process of converting on the top. The spigot allows you to drain completed vinegar out the bottom for use and not disrupt the vinegar mother(s) by pouring out the top of the jar.
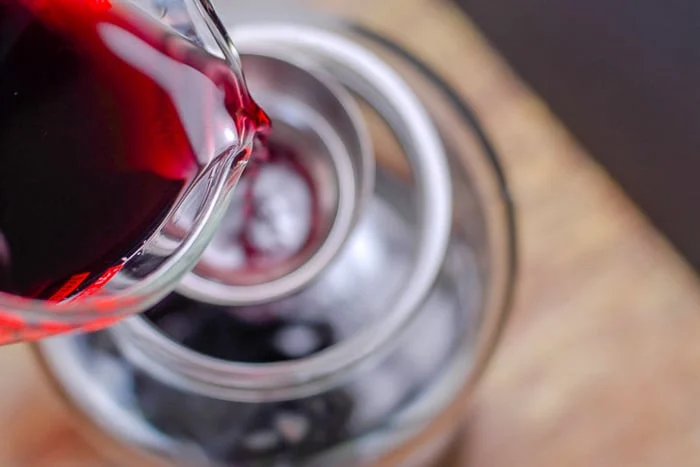
STEP 3: ADDING LIQUID
The vinegar mother container will have instructions about the initial liquid to add.
For the red wine vinegar, I added 16 ounces of organic sulfite free (that’s the hook; you want to use low or no sulfite wine as sulfites can impede the conversion process) red wine combined with 8 ounces of water and pour it into the jar (too high an alcohol content can also impede the process so it needs to be diluted). Then add the red wine vinegar mother.
For apple cider vinegar add a bottle (22 ounces) of organic hard cider and the apple cider vinegar mother.
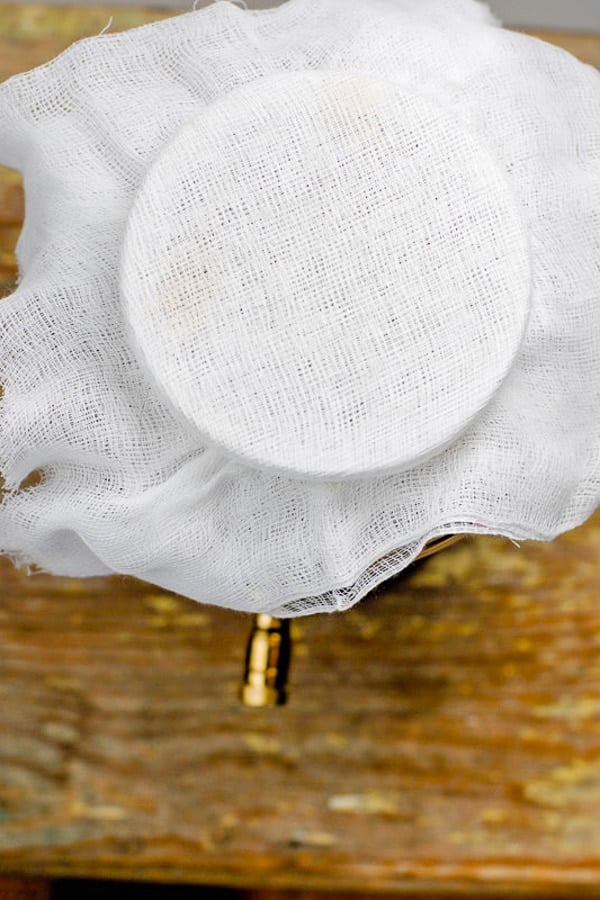
STEP 4: COVERING THE VINEGAR JAR WITH CHEESECLOTH
The final step, for either vinegar type, put the cheesecloth (I recommend 2-3 layers) securing it with rubber bands.
It needs to be enough to disallow fruit flies from entering the vinegar container but not so much it blocks air circulation (see more below in Troubleshooting).
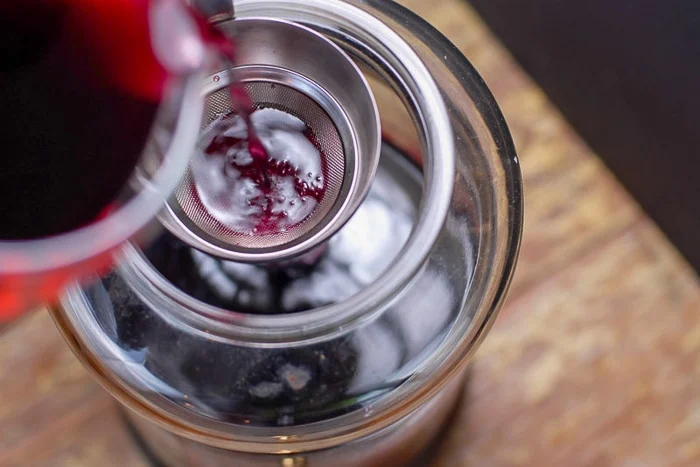
STEP 5: FEEDING THE VINEGAR MOTHER
Until the vinegar begins to convert you want to hold off on regular feedings so as to not overwhelm the mother; which can cause the vinegar production to slow down.
Also, I added my liquid with a funnel with a bend in the lower tube trying to direct the liquid to run down the side of the jar so as to not disrupt the mother.
When ‘feeding the mother’ I use a funnel to direct the liquid to run down the inside of the jar if possible so as to not dislodge the vinegar mother (if that happens however, a new one will grow)
I’ll include my notes that show my intervals of adding liquid, though I added more liquid to mine about once a month.
Continue to feed it the same amount you started with each time until you are getting vinegar (or at a minimum ensure the wine is always diluted with half the amount of water).
I was very regimented at first but do it when I think of it now that I have a good size batch to draw from.
RECIPE FAQS + PRO TIPS
WHEN WILL IT BE VINEGAR?
The full conversion process takes about 3 months depending on the conditions where you keep your vinegar.
The warmer it is the faster it converts. You don’t want it overly hot (like in a boiling garage in the middle of the summer) for you can kill the mother.
HOW DO YOU KNOW THE VINEGAR IS DONE?
By tasting it. You will also smell the vinegar. It’s not very strong but notable.
The vinegar may be left in the container and the amount needed drawn via the spigot per use. Some people prefer to drain a full batch, pasteurize it by heating it and bottling it.
You can infuse it with herbs as well (in a container separate from the main batch).
Recipes like Homemade Cranberry Vinegar which uses apple cider vinegar (this recipe also comes with free printable gift tags when giving it as gifts) are another fun way to use your homemade vinegar.
VINEGAR MAKING: TROUBLESHOOTING POTENTIAL ISSUES AND SOLUTIONS
FRUIT FLIES
Depending on time of year and where you live, fruit flies may come to visit. They love vinegar.
SOLUTION: Three layers of cheesecloth, tightly secured to the jar opening will keep them out. I had a mass visitation this past fall and resorted to putting out small bowls with a bit of vinegar and a drop of dish soap in them which did the trick.
PROPER AIR CIRCULATION
While the process is beginning really pay attention to the conditions where you are keeping the vinegar and the smell. If you get an acetone smell, check to ensure you are getting enough air circulation.
SOLUTION: Gently move the vinegar container to an area with better air circulation. Moving may dislodge the vinegar mother but another one will grow.
EVAPORATION
I’m not sure this is really an issue but something to watch and prompt feeding the vinegar mother. I noted when decloaking my red wine vinegar for photos a ‘recession line’ where I noted evaporation.
I had not added liquid for awhile as it was winter though it was dry and the heat had been running raising the room temperature.
SOLUTION: Keep a watch on the liquid line and add more liquid if needed.
VINEGAR MAKING SUPPLIES: WHERE TO BUY
THE VINEGAR MOTHER (OR ‘STARTER’)
STARTING ADDITIONAL VINEGAR BATCHES FROM YOUR VINEGAR MOTHER
The guys at Northampton Beer and Wine told me that once the vinegar mother has dropped from the top of the batch they are not as potent but also do no harm (if they get in the way of your spigot draining vinegar just take them out but leave the top active mother).
If you were to want to start another batch you can cut part of your active vinegar mother (the uppermost one in the jar) along with some of the vinegar liquid and start it in another jar or give it to a friend.
The vinegar mother you use part of will regenerate or another will form in your batch. They also shared in many cultures the inactive mothers are cut up in salads or other dishes for their believed medicinal properties.
Instructions
- 1 Vinegar Mother for the type of vinegar being made (e.g. apple cider vinegar mother, red wine vinegar mother, etc)
For Apple Cider Vinegar
- 22 ounces Organic Hard Cider
For Red Wine Vinegar
- 16 ounces SULFITE-FREE Red Wine
- 8 ounces Water
- Cheesecloth
- Rubber Bands
Instructions
Before Beginning
-
Determine where the vinegar will be made. It should be a place where it can stay (the vinegar mother does not love moving). It will need warmth (70-80 degrees is ideal), darkness and good air circulation.
-
Sterilize your jar with hot water (not boiling) and drain. Check that the spigot is functioning properly before beginning.
Making the Vinegar
-
Adding liquid. The vinegar mother container will have instructions about the initial liquid to add.
-
For the red wine vinegar Combine 16 ounces of organic sulfite free (required) red winewith 8 ounces of water in the jar. Then add the red wine vinegar mother.
-
For apple cider vinegar Add a bottle of organic hard cider and the apple cider vinegar mother.
-
The final step (for either vinegar type): Put 2-3 layers cheesecloth over the opening of the vinegar container securing it with rubber bands.
Feeding the Vinegar Mother
-
Until the vinegar begins to convert hold off on regular ‘feedings’ (addition of more liquids) so as to not overwhelm the vinegar mother. Under normal temperature conditions adding the same amount of liquid as the initial ingredients monthly is about the right interval.
-
NOTE: adding additional liquid once the vinegar mother has formed with a long neck funnel to allow the liquid to drain into the jar along the glass (vs pouring it onto the vinegar mother) helps not disrupt the mother.
-
The full vinegar conversion tastes approximately 3 months and can be affected by temperature. Tasting the vinegar will confirm when it’s finished.
-
Liquids can continue to be poured into the vinegar container to continue vinegar making or the completed vinegar may be drained from the container and stored.
-
If the mother is left in the container for too long it can begin to rot and adversely affect the finished vinegar.
Things to Know
Acetobacters tend to be very temperature-sensitive. They are happiest between 59 and 94 degrees Fahrenheit, with an optimum range of 80 to 85 degrees for acetification, and they die off at temperatures over 140 degrees. A clean, sterilized container for storing your vinegar during the fermentation process is a must. Small oak barrels can be purchased online, although we’ve found that large glass cookie jars with loose-fitting lids are an economical alternative. Acetobacters need oxygen to function, so airtight containers will not work for the fermentation period. Pure, soft water should be used for any dilution of the vinegar stock. The chlorine and fluoride found in municipal water can have an adverse effect on the fermentation process, so filtering your water is recommended. Once the fermentation process has begun, the vinegar stock should be left alone in a dark spot because acetobacters are sensitive to UV light for at least two to three weeks. The vinegar-in-progress should not be stirred or agitated during the fermentation period.
When making homemade vinegars, a vinegar “mother” or mat will often appear in the container of liquid during the fermentation process. This development is a good, though not a necessary, occurrence, because the mother’s appearance indicates a healthy environment for the vinegar’s development. The vinegar mother can take on a variety of forms, ranging from transparent to dark in color, and delicate and leaf-like in appearance to a solid mass floating at the top of the container. It is usually comprised of cellulose and complex sugars. Once the vinegar is completed, the mat should be removed and either used to create another vinegar or simply discarded from your base. If the mother is left in the container for too long it can begin to rot and adversely affect the finished vinegar.
After a few weeks of fermentation, it is time to test your vinegar. You will want to check the sugar, alcohol, acetic acid levels, and, of course, the flavor of your product. For a home brew you may simply wish to taste your vinegar and proceed accordingly; for a more scientific approach, test kits can be purchased from most home brewing or winemaking supply stores. You can use a titration kit to determine whether or not the acetic fermentation is complete. Alternatively you may simply judge by looking for a complete absence of alcohol in the nose and on the palate when tasting the vinegar. Once the acetic fermentation is complete the vinegar should be strained and transferred to airtight containers to reduce the risk of spoilage. Once the alcohol disappears, in the presence of oxygen the acetobacters will continue to break down the vinegar into carbon dioxide and water, reducing the acid levels and leaving the vinegar open to the development of various undesirable microorganisms. Straining the vinegar and transferring it to an airtight container will safeguard it from deterioration.
The final step in your vinegar-making process is aging. Fresh vinegar has a sharp, intense flavor. The aging process allows the esters to mature and the flavors to develop. If the vinegar is aged in wood, care should be taken to ensure that the barrel is topped off on a regular basis. Otherwise, simply storing it for several months in a sealed, airtight container will do. A minimum of six months is generally recommended for maximum benefit. Once the vinegar has been aged it should be racked or gently poured off the sediment and rebottled for use. source source
For detailed instructions on how to use our Mother of Vinegar click here